 Not just that band that I was obsessed with in high school, not just the kind Aldous Huxley wrote about, no… the real kind, the kind you would need if you were to say be building a big boat that you wanted to one day be able to take outside…those kind of doors.
This whole door thing has been keeping me up at night pretty much since September. At that point, before I had been swindled by a steel building company that doesn’t rhyme with Schmouthwest Schmeal, the doors were just a couple lines in an excel spread sheet of expected costs…I look back on those simpler times and laugh, and cry a little. Actually, I don’t think I even had a cost, it was just in a list of things I had to do…Figure out doors! Funny how just one bullet point has consumed so much time and money. My initial plan, and I stress initial…was to just pull the end of the building off when we finished the boat. Seriously that was my whole plan. I figured I had more than a year to figure it out so why stress. That was then…
My next realization came when AFTER the building was delivered (and my checks had been cashed) I realized that the framing plan had two 27’wide girts that spanned most of the front and back of the building at 7’6” and 11’6” high. Both of these would be directly in the way of moving the boat out. Even if we took all the siding off they would still pin us in.
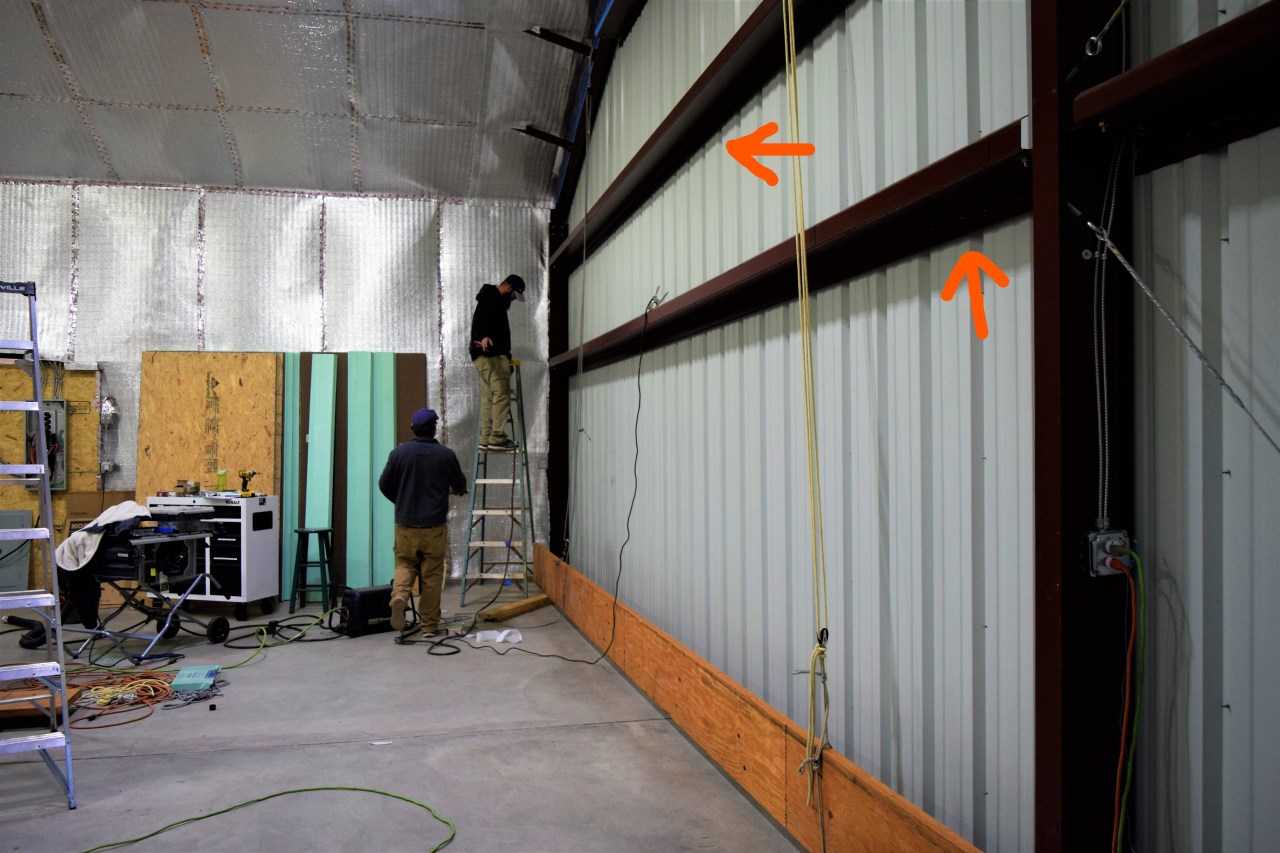
The girts were 8″ wide so we planned to cut them and build a frame to them. We chose to leave them to provide more stability to the door and keep things together while we were working.
As we were in the middle of many many other pressing matters I kinda filed that panic attack away and knew it would be a big deal eventually, but as I have said many times it is tough to be worried about any particular fire when you are surrounded by them. Perhaps sharks circling a deflating life raft is a more accurate analogy. You can’t really worry about any specific shark, it’s more the general sense of impending doom that seems pressing. So as we started to put the building up I realized that the girts were structural and even though I had a year to figure out the door issues, I realized it was gonna be a doozey. This was back when the steel company would still return my calls. Call them we did, we went so far as to reach out to the building manufacture and offer to pay for the modifications if they could just send us what we needed to brace the building and frame the opening. As I said…back when they would answer…
At that point I started to really realize the magnitude of the problem we faced. I went back and looked at the original plans I signed and yes, they had the door framed in. I won’t go into the details, but to summarize I believe the contract I signed and the initial plans had the opening I needed…the final plans didn’t. The upside is the initial plans didn’t include the steel siding…so I guess that’s the silver lining… or grey steel siding.
My rough draft was a very general idea to build the doors in place and try to reuse or retain as much of the current building materials as possible. I sketched openings, and timber framed jams and a header. I thought about bi fold doors, vertical and horizontal, I almost purchased a track system to slide the doors. I watched every YouTube video I could find. I reached out to companies that make airplane hangar doors and even had a roll up door company come down and give me a quote for their door. $7000!. Yeah…No. I realized this would very much be my problem to sort out. I knew we needed at least a 24’ wide by 12’ high opening.
My first idea was to build very big barn doors…but after doing a lot of research I wasn’t sure the wood was strong enough and I thought the hinges would sag. Plus, hinges that were rated for the 500lbs I figured the door would weight were prohibitively expensive, and so I kept looking.
Initially there was no deadline…but as everything else lately that changed very quickly. As a favor to a friend Pat had offered to do some work on a 30’ fast cat. In November when the boat made its way to our place we didn’t have much of a plan, but knew we needed to spend some time on the boat over the winter. At that point we figured we could take it to another marina and haul out there, as we were still getting the building together I again kinda reminded myself to ask Pat more on it later. And so, it sat at the dock…and then then it got incredibly cold in December and the whole river Froze and so we now had to figure out a way to get the work done at our facility. I thank Pat a ton for bringing this project to Ojigwan Yachts as it’s really the first official project we have…the downside was that it greatly accelerated two major projects I thought I had at least a year to plan. So now as the building was coming together we had one month to get everything sorted out so we could meet our deadline on the first possible income.
With the building starting to come together and a few of the circling sharks had either be killed or lost interest I was now able to focus on the few tenacious ones that remained, the door and the ramp. For those who have been to our location you notice two things immediately when you realize the project we have begun…
- Our building doesn’t have a door.
- Our ramp is incredibly steep and narrow
- The ramp is out of the water at low tide…important.. but kind of a nurse shark at this point
These two issues are fairly epic deal breakers for what we are trying to do. To do projects we need a way to get them in the shed…We also need a way to get them to and from the water as we hope to work on boats. For smaller boats this wouldn’t be an issue…but as we currently have a 30’ long by 18’ wide sailing cat at the dock…these issues have become pressing.
I spent a few late nights sketching sketchy plans on how to build the door. I finally settled on 2 bifold doors with an overhead track system to help take the load. After consulting with my neighbor Jon Bergman (as I generally do for many major problems), I decided on using a product called LVL (Laminated Veneer Lumber) to be the header or overhead structural support. LVL is not too expensive and can be ordered in almost any length so for us it would be the strength we need to support such a big opening.
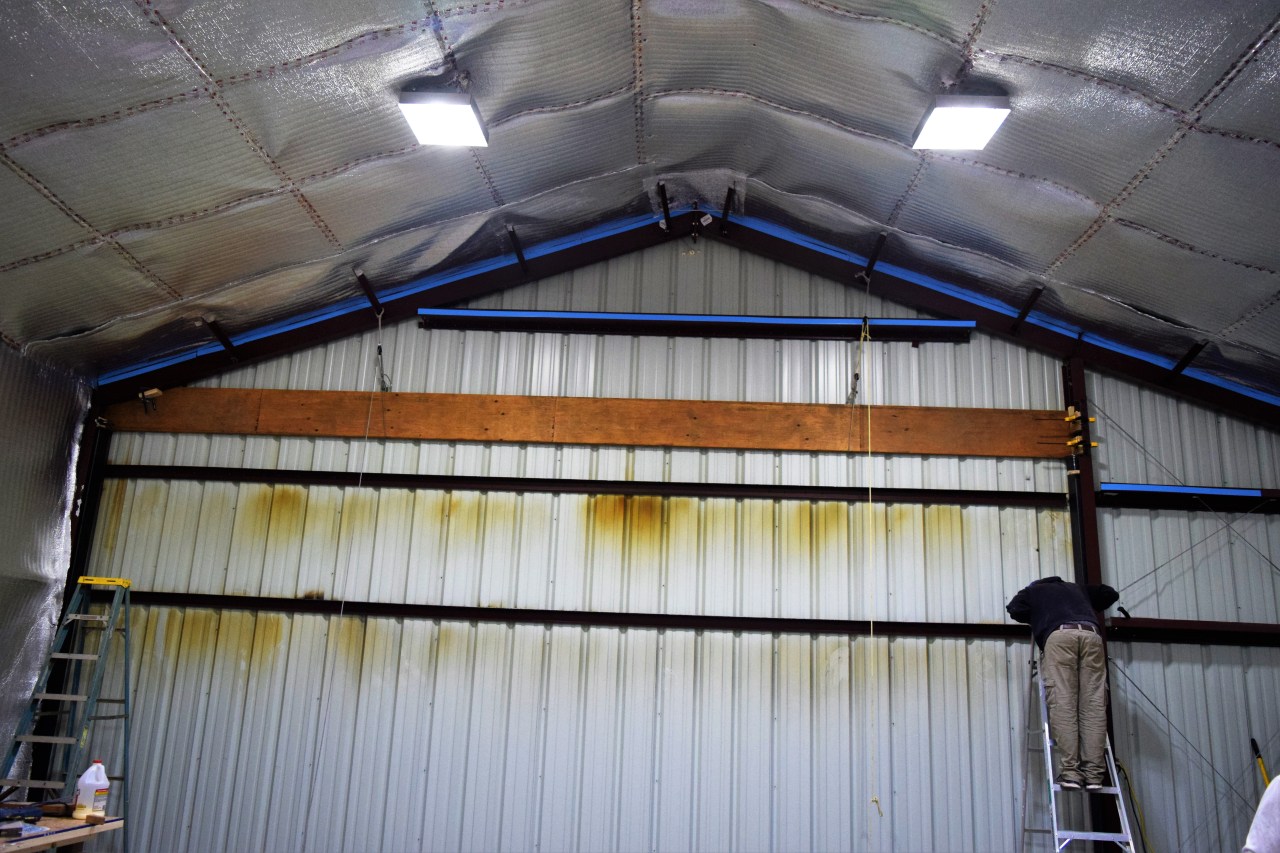
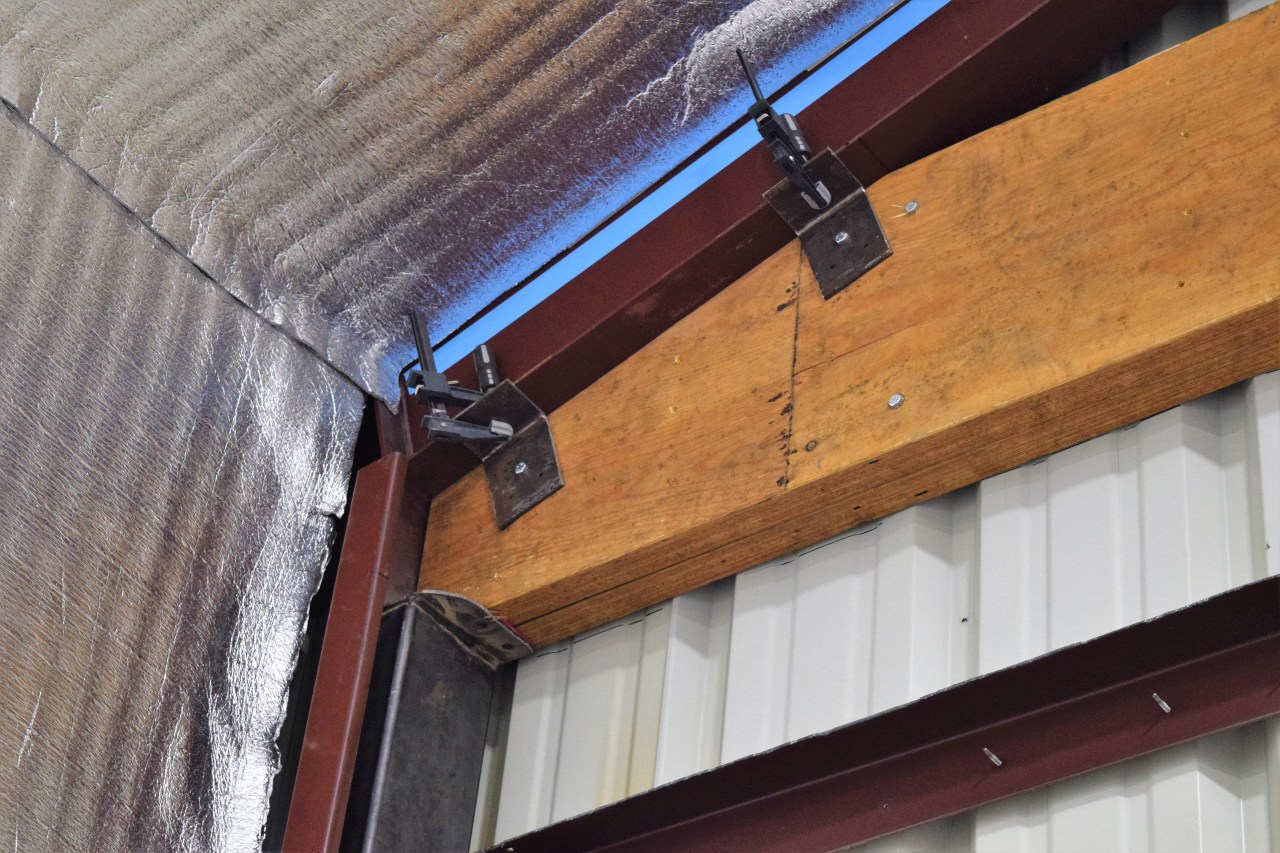
This is the LVL after we cut and installed it. Note the Harken blocks and our hoist system.
It was at this time I realized I needed to get an engineer to certify my plan. My worst-case scenario would be if the building collapsed and our boat and all our tools were destroyed. So, I took my drawings and met with Ned…Ned also did our foundation plan and we had developed a good relationship with him and his firm. Ned was able to put our plan into a stamped/certified drawing that the county and insurance company would accept. With a loose plan and some photos I took, Ned was able to confirm what we proposed would work. He got us a rough draft a week later and we purchased the materials. The final drawing came in two weeks later. With time being of the essence we decided to build the support before the drawing was complete.


We special ordered two 28” long LVLs and started working up our plan. We devised a block and tackle system to raise the LVL into place. They weight 205 lbs each and need to be over 12’ high in the air and fit in like a puzzle piece. We had many many conversations on how this would work. As the steel columns are I beams they stick out further on the edges than in the center…and so getting a 27’ wide beam into a 26.5’ hole was a bit of a puzzle. We finally decided to just cut out the steel.
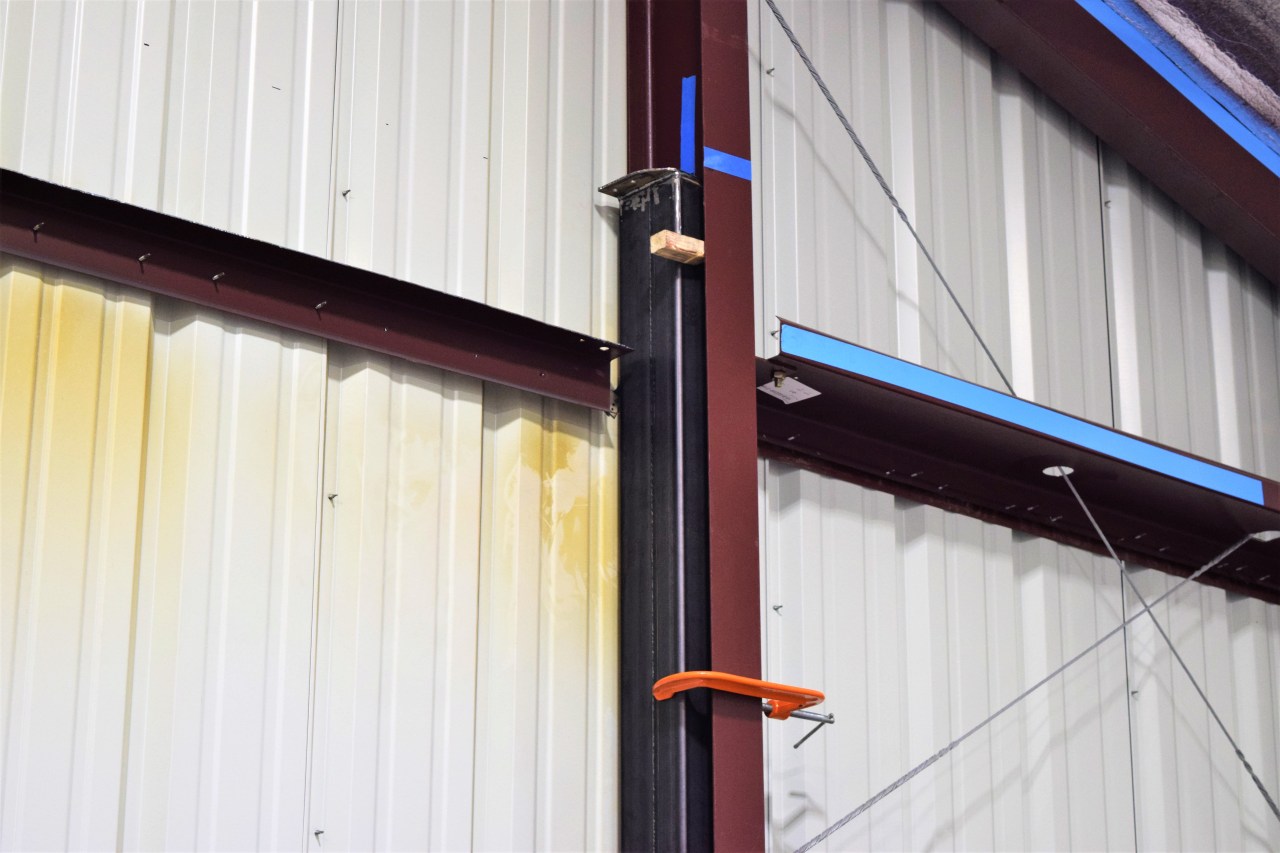
We reinforced the existing columns with steel tubing so we could weld the hinges directly to the building on both sides. Added a lot of strength and doubled as a support for the LVL header.
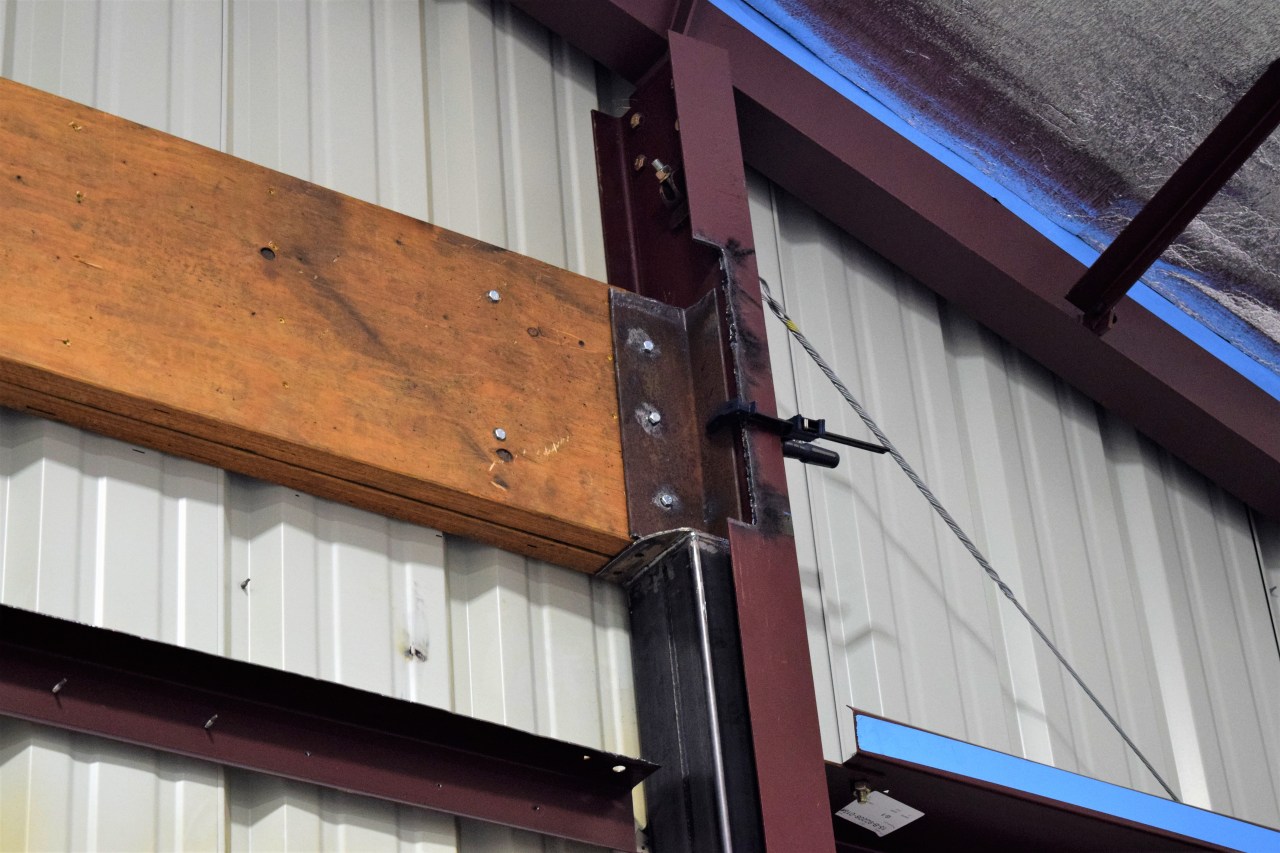
Note where we had to delete the flange on the column.
We had to template to get an exact fit.
We met with a local welder and gave him the specs for some steel brackets that would eventually be welded in place to hold up our LVL. Our plan was to bolt them first so we could put things together on our own and have him come back and weld them later. After thinking a lot, I kinda gave up on the track/bifold system. It seemed overly complex and actually reduced our useable opening width. I decided on just standard swing open barn doors. I was still nervous if the hinges were up to the task, but with my Dad and Pat’s help we came up with a plan to through bolt the hinges to the building and reuse the girts to attach the hinges on the door side. All in all I felt good about it, but still had some doubts. We planned to have the whole thing done in three days…On the morning of the first day I called the welder and asked for the brackets…well he had forgot to make them and was now in Tennessee. That was going to be a problem as I had 3 guys on hand to help with the build. He quickly gave me a name of a local guy who as promised showed up a few hours later.
As I have mentioned the whole door thing has been a constant source of stress…but the ramp…aahhh the ramp…now that is a problem I can just sub contract out to actual experts…and that’s what we did. We put in a call to Burgess Hauling and Excavating. They are the same folks who dug our footers and got the gravel under our slab. They are a local business and they do amazing work. The ramp had a lot of storm damage and had a dying cedar tree that was falling over it and lots of erosion so it needed a tune up anyway.

Ramp in it’s initial configuration, note leaning tree and steep narrow sides.

The original clearance for the ramp was only 12 feet, nowhere near the 24 we will need for our boat.
We got Burgess on the job and in just a couple of days they had it looking incredible…it was now wide enough. Getting the boat on the trailer and up the steep ramp was another challenge…one that involved me swimming in the freezing water in February, but that’s a story for another day.
If only Burgess did barn doors!

Final configuration of the ramp. Better…Still not great, but wide enough.
 John Burgess, who if we are being honest is kind of a local legend, came in the shop and was interested in our floor heat system. He is considering one for his next shop. We got to talking and as with anyone who comes to the shed…I asked what he thought about the whole door thing. He asked why we didn’t just build it out of steel. Honestly, that was what I had wanted to do all along, but I have no experience or tools for welding and metal working. By this point we already had the wood on hand, but John recommended a good local guy. His name is Jessie Dudley AKA JD HAAWG! John described him as a redneck genius… I felt like JD was our man. And as it turned out he already happened to be coming over anyway…
At this point JD Hogg shows up with the brackets as promised. He gets to looking at the wall and says…”Well why the hell don’t you just build it out of steel!” Of course the welder recommends steel. I had always wanted it made out of steel, but as I don’t weld, or have a welder, or know where to buy steel, I said I planned on wood as I know how to do wood and I had spent close to 40 hours researching, planning and buying materials for a wood framed door. So Cooter starts looking things over and comes up with a pretty sweet plan. In less than 30 minutes I knew this guy could do it and so after months of planning and drawings we completely changed our plan. We made a steel door. He let us borrow his plasma cutter that day so we could cut the girts. He made a few calls and said we could get the steel by the next week. This new plan called for welding in new steel columns/supports and a steel frame for our existing siding and welded hinges. It sounded beefy and strong and it was what I had always wanted. JD was the man with the plan and so we spent the next week getting ready.
Girts were cut, but left in place to provide support.
We got the LVL installed, and cut the girts and got all the hardware ready. While I was on travel for my other job, Pat and Panek and JD built the frames and welded in the new columns. When I came back I was very impressed. JD Hogg was as advertised. He even left us his welder this weekend encouraging or more accurately daring us to finish the job. As the rain poured outside we welded and cut inside like ‘riders on the storm’.

JD Hog at work
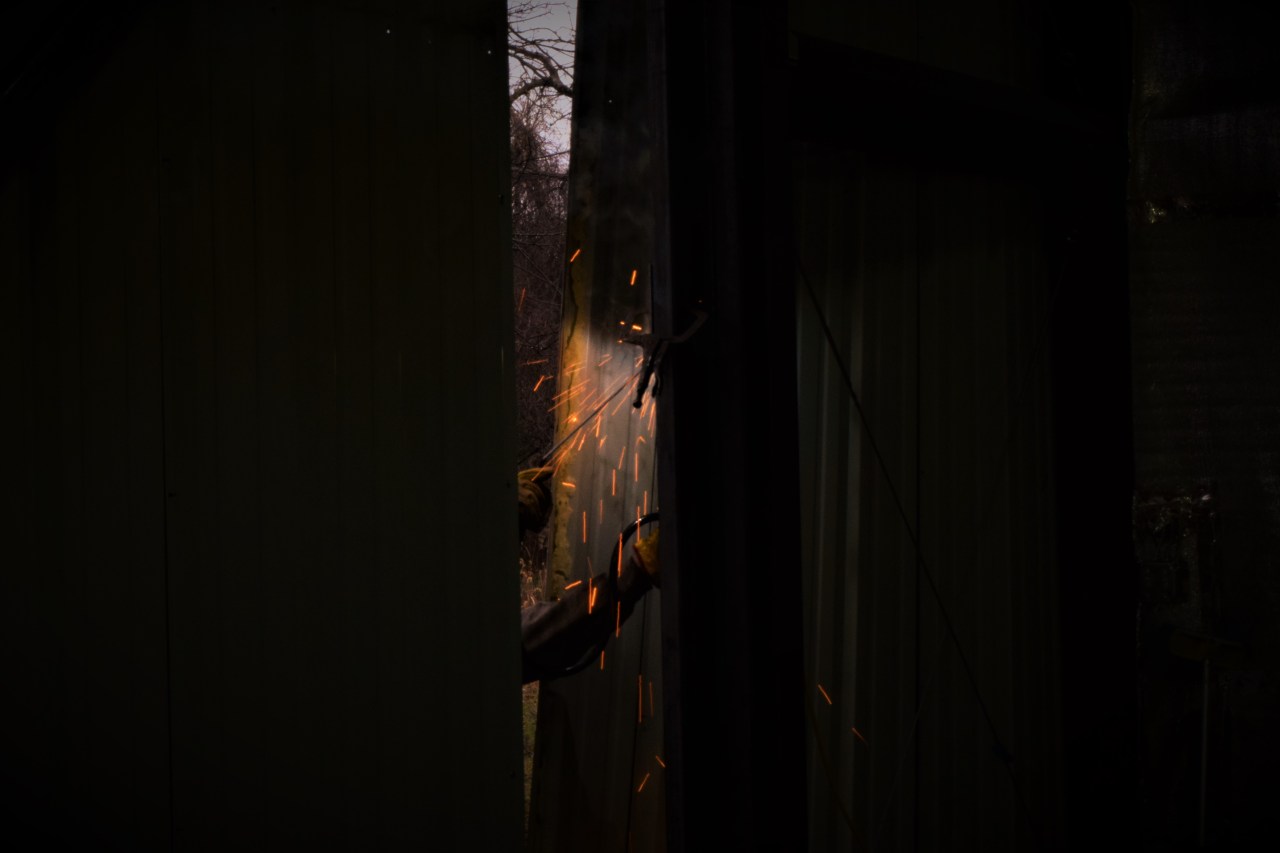
I won’t say I have gotten good at welding…but I have improved and it’s been so fun. It is such a satisfying experience and one that like most of this, felt like something I didn’t or couldn’t understand until I gave it a go and then realized it wasn’t so scary and in fact ended up being really fun.
Good practice
I welded everything to those doors we could. We started just coming up with excuses to turn it on and add handles, or a latch or locks, it was as if everything was saying ‘light my fire’. We even welded holders for the latch when it’s not being used.
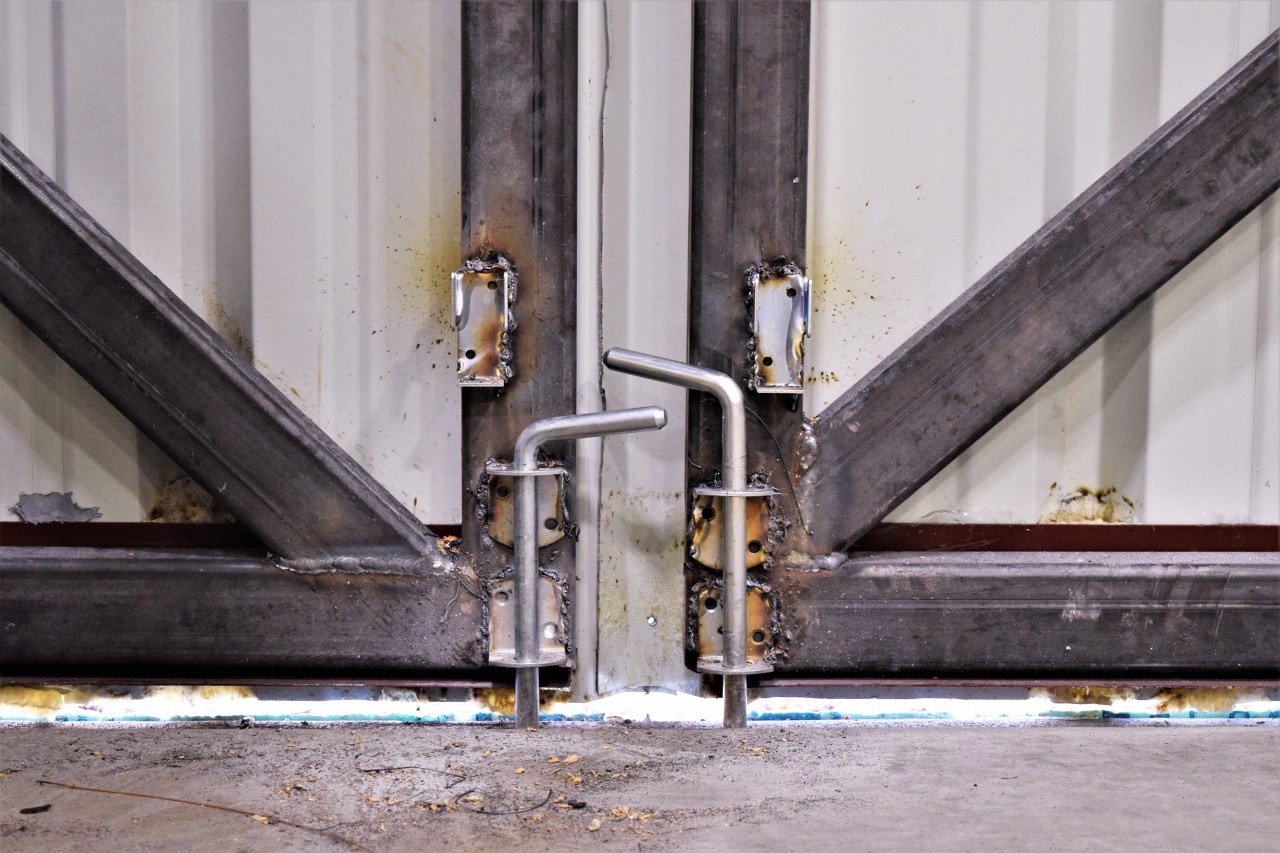
For the bottom closures we drilled into the concrete and welded to the frames for a security latch.

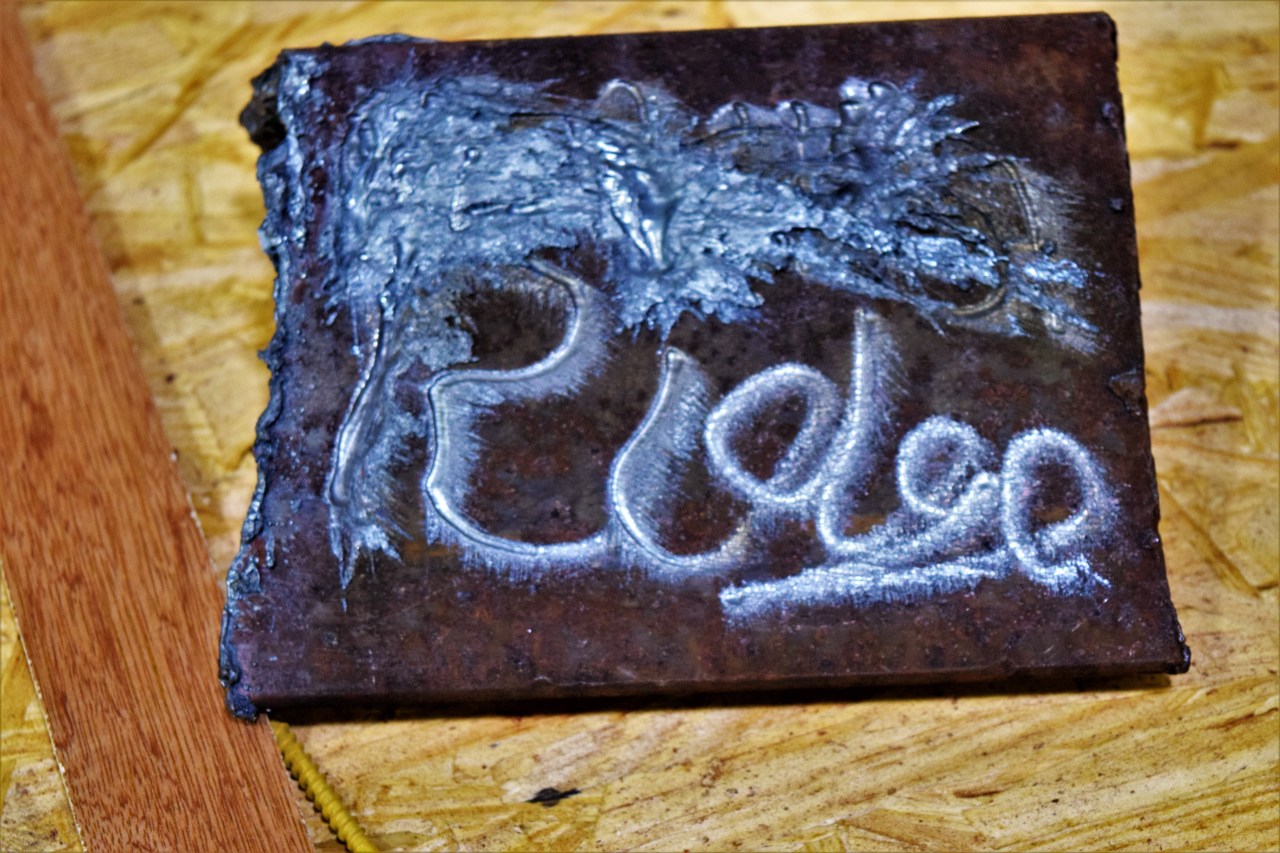
We made handles out of some left over rebar.

This is a temp top lock, note the jagged girts double as anti theft devices.

Left over hardware is an excuse for more welding.
What we ended up with is a much stronger and secure solution than we originally planned. As with every phase of this project we are faced with a problem and through a series of mistakes and wrong turns we somehow end up with a solution that seems on purpose. We found the right people to help us get a problem solved; I think the part that is so satisfying is that we were so involved in the process, a process that seemed elusive and daunting, but in the end serendipitously turned out better than we had hoped.

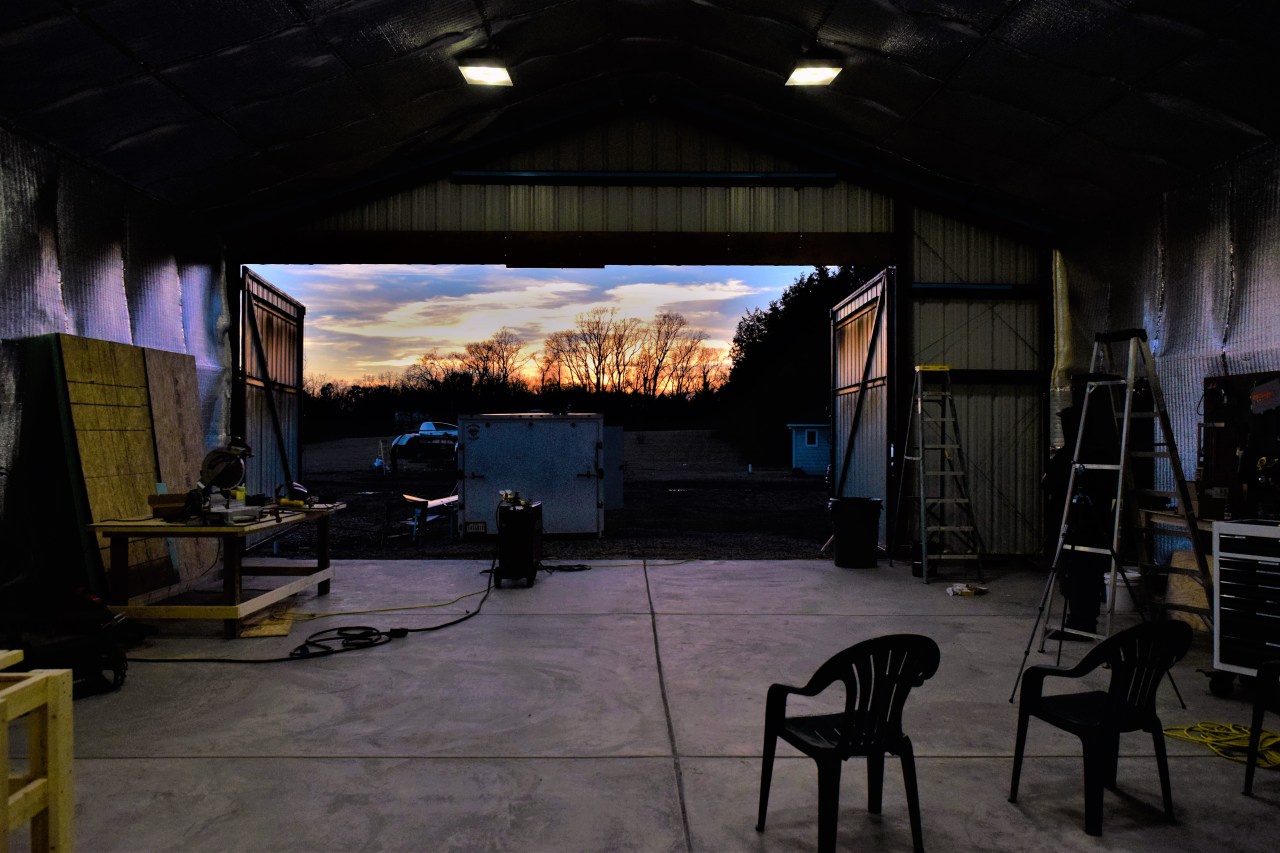
By using the existing materials we made a strong, inexpensive secure door that blends in nicely. Hard to believe there is a 26′ wide door there.
‘The End’
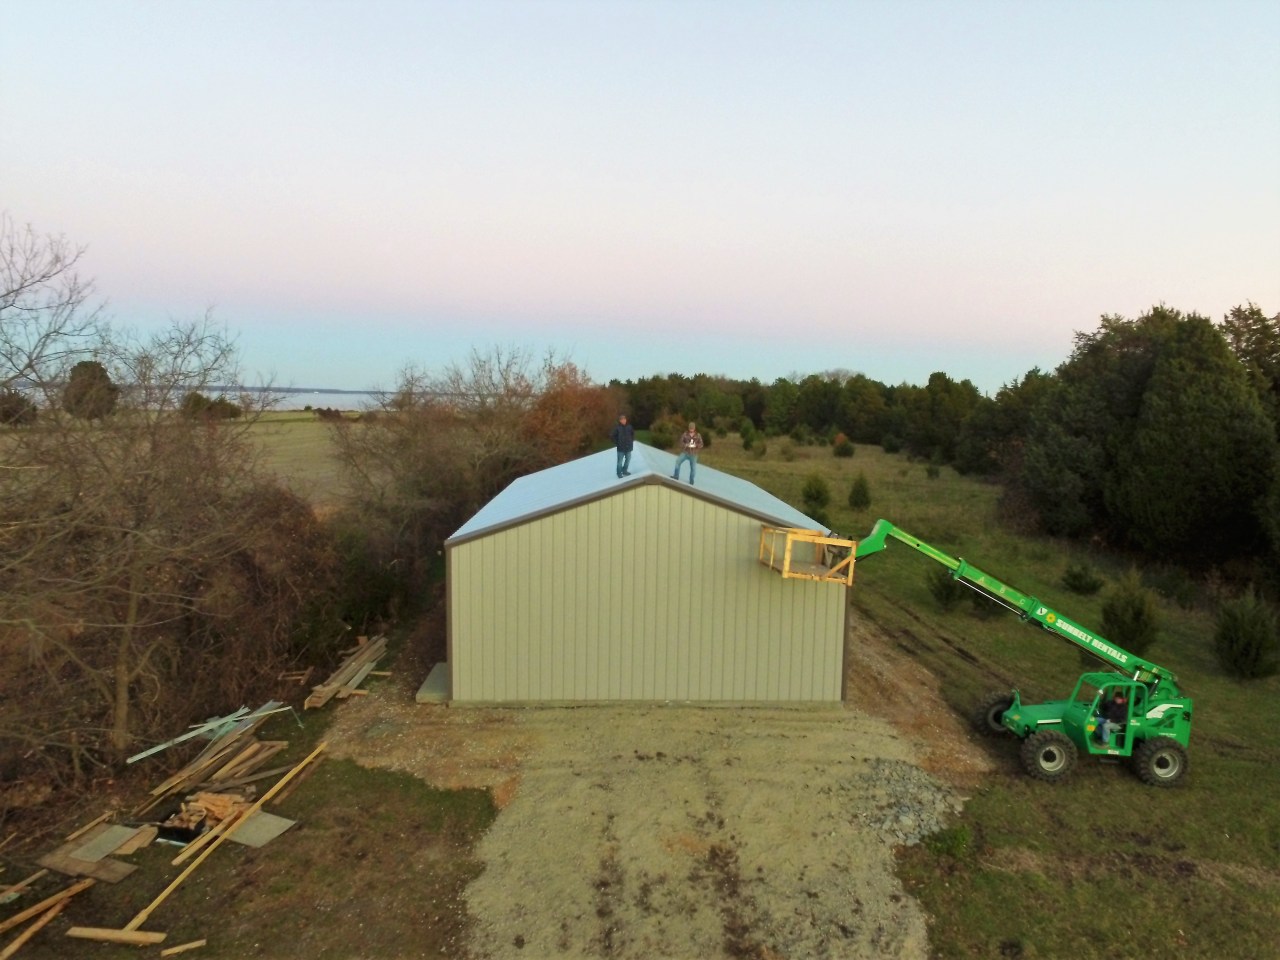
Not a bad view from the office!


Leave a comment